

This tutorial is for complete beginners to time-lapse photography and will show you all the settings and equipment you'll need to start taking time-lapse videos with a DSLR camera relatively cheaply. Although this tutorial focuses on the Canon 7D, the steps outlined and equipment discussed also applies to other models available on the market.
Everything you'll need to know is in the video; the written steps below serve as a quick reference guide to further help you in your time-lapse photography.
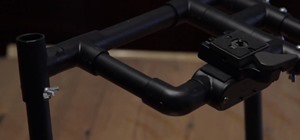
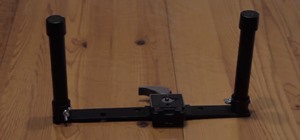
Step 1 Hardware
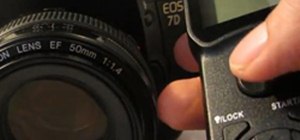
Although the Canon 7D has a built-in timer, it only allows you to delay up to 10 seconds before taking a photo. In order to take time-lapse photos, you'll need to invest in a bit of extra hardware called a time remote.
There are a number of different brands on the Internet, but I use the "JJC TM-A Timer Remote" because it has all of the necessary functionality that a more expensive model will give you, but at a much cheaper price.
Tip
- One of the great things about this particular model is that even without any batteries, you can use it as a hands free shutter release which can be useful in other photography situations to avoid shaking the camera while you press the shutter release button on the camera.
Step 2 Preparation
Connect the timer remote to your camera and insert a fully charged battery into your camera.
Tip
- Creating a new folder on your camera before taking photos will save you a lot of time afterwards as you just have to copy this folder to your computer rather than searching through many photos.
Step 3 Setting Up Your Camera
Position your camera somewhere safe on solid ground, pointed at your subject. You must set your camera to a manual mode; this can be either M, B or one of the custom profiles.
If you set your camera to Mode B, then the BU or BULB setting needs to be set on your timer remote. This is the shutter speed you want to use.
Personally, I like to set all of my settings on the camera into a custom profile as this is quick and will save you from having to remember all these steps next time.
Tip
- Editing the highest resolution photos into a sequence can take up a lot of memory and be resource heavy. I normally create HD movies out of my time-lapse sequences, but I find that setting the image size to small is more than enough.
Step 4 Custom Profile
-Turn the Dial to C2
-Press Q and set the ISO, Aperture and Shutter Speed to what you want to use.
-Make sure you're in "Single Shot" Mode
-Set the lens to Manual Focus and set this to bring your subject into focus, if you leave this on auto it'll readjust on ever picture taken which will use up the battery quickly and may not give you good results.
-Turn OFF image review. Menu>First Tab> Review Time> OFF. You don't want the image showing up on the LCD screen after every photo as this will quickly drain the battery.
-Now save this as a custom profile (see video).
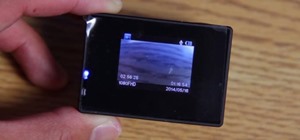
Step 5 Set the Timer Remote Up
The operation is relatively simple.
- Press the middle button to edit values and press it again to accept the changes.
- Left and right arrows cycle through the different settings.
- Up and down arrows adjust the time for these settings.
Here is an explanation of the different settings:
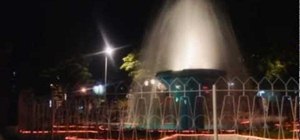
DE: Delay/Self Timer: This is the first countdown time from when you first press the shutter release to when you start taking pictures. This only happens once. For instance, if you wanted to start taking photos of the sunrise, you could set this delay to be 9 hours so you can go to bed and it'll start taking pictures by itself when it's time.
BU: Shutter Speed: How long the shutter is open for each photo. NOTE: You should set this to 0. This tells the timer remote to look at what you've set the shutter speed to on the camera and to use this value. You should only set this to anything else if you are in B mode on your camera, in which case you need to set this as this is your shutter speed value.
INT: Interval: How long a pause you want between taking each picture (needs to be at least 2 seconds longer than the exposure time/BU).
N: Number: How many photos you want to take.
Sound: Turn this off to save batteries and not hear a beep before every photo.
Step 6 Initiate the Timer
Your camera is set up. You've adjusted all the settings, you've removed your lens cap (only checking!) and you've put in the values into your remote timer. Now all that is left to do is hit the Start/Stop button and leave your camera alone.
You can stop at any point by pressing the Start/Stop button.
Step 7 Putting the Images Together
Most editing programs will have an import images option. You want to make sure you select "Import Image Sequence" or "Import Images as Sequence"—this way you select the first image and it'll automatically create a clip of all these images together.
I hope you enjoyed this tutorial and hope it helped you to get past all the technicalities of starting time-lapse photography.
Just updated your iPhone? You'll find new emoji, enhanced security, podcast transcripts, Apple Cash virtual numbers, and other useful features. There are even new additions hidden within Safari. Find out what's new and changed on your iPhone with the iOS 17.4 update.


Be the First to Comment
Share Your Thoughts